Showing 3 Result(s)
Fashion

Why Statement Jewelry Is Moving Beyond Rings, Chains, and Earrings

modern statement jewelry

Jewelry has been used for thousands of years to shape how the body is seen, from ornaments worn on the head and face to pieces placed around the waist, arms, ankles, and feet. The Metropolitan Museum of Art describes jewelry as an art form that can extend, emphasize, transform, or distort the body. That broad history helps explain why modern statement jewelry is no longer confined to the ears, neck, wrists, and fingers.

For people who want accessories to feel more personal, the challenge is that conventional pieces are already everywhere. A bold necklace or oversized ring can still stand out, but wearers are also looking at less expected areas of the body. Tooth jewelry is one example. Styles such as gold grillz place the visual focus on the smile, turning teeth into part of an overall fashion look.

1. Tooth Jewelry Moves the Focal Point to the Smile

Dental decoration is not new. The American Dental Association notes that tooth ornamentation has appeared in different cultures, including ancient Maya practices involving decorative inlays. In modern fashion, removable dental grills and tooth gems have become visible forms of personal adornment. The association also notes that grills were popularized through music videos in the 1980s.

The visual effect varies. A single-tooth cap creates a small accent that may become obvious only when the wearer smiles. A fang-shaped piece changes the outline of one or two teeth and creates a sharper look. Multi-tooth designs spread metal across several teeth, making the jewelry more noticeable. Open-face styles frame parts of the teeth instead of covering the full visible surface.

Rhino Grillz currently lists single-tooth caps, fang designs, open-face pieces, and multi-tooth styles. The range shows how one category of dental jewelry can move from a relatively subtle detail to a stronger visual statement without every design using the same shape or coverage.

2. Body Jewelry Expands the Map of Adornment

Statement jewelry has also moved into areas once treated as separate from mainstream accessories. Nose rings, lip jewelry, eyebrow pieces, ear cuffs, and other forms of body adornment allow jewelry to frame different features. The Metropolitan Museum of Art has documented a long global history of ornaments worn on the nose, lips, hair, waist, ankles, and other parts of the body.

Placement changes the effect. A tiny nose stud can blend into an everyday look, while a larger cuff, chain, or sculptural piece can become the main visual feature. Jewelry can now be chosen by where it creates impact, not simply by which category it belongs to.

3. Personalized Pieces Make Familiar Jewelry Feel Less Standard

Another route beyond conventional statement pieces is personalization. Initials, names, dates, symbols, birthstones, and custom shapes can make a simple pendant or bracelet feel specific to one person. The wearer does not need an unusual body placement to create distinction because the meaning of the piece itself adds individuality.

This approach can be subtle or highly visible. A small engraved charm may carry private meaning, while an oversized nameplate or custom-shaped pendant turns that personal reference into a public design feature. The idea of watches as a fashion statement reflects the same shift, since even familiar accessories can express personality through their materials, proportions, straps, and overall design.

4. Unusual Metals Change the Look Without Changing the Form

Statement jewelry can also feel new because of its material. Gemological Institute of America resources describe titanium, tungsten carbide, cobalt, ceramic, and stainless steel as alternatives to traditional precious metals. Titanium, for example, is lightweight, resistant to corrosion, and available in polished, matte, or anodized finishes.

These materials can make a familiar ring, cuff, or pendant look more industrial, minimal, or futuristic. The form may stay conventional, but the surface, weight, color, and finish can change the overall impression.

5. Distinctive Shapes Turn Jewelry Into a Visual Object

Some statement pieces attract attention through form rather than placement or material. Oversized proportions, asymmetry, sculptural curves, unexpected textures, and mixed materials can make jewelry behave almost like wearable art. The Metropolitan Museum of Art notes that avant-garde jewelry has challenged traditional ideas of preciousness by using materials such as aluminum, rubber, plastic, resin, and paper.

This widens the definition of a statement piece. Value is not always communicated through gem size or precious-metal weight. Sometimes the statement comes from surprise, unusual construction, or the way a piece changes the wearer’s silhouette.

Jewelry Is Becoming More Flexible as a Style Tool

Rings, chains, bracelets, and earrings are unlikely to disappear. They remain familiar and adaptable. What is changing is the idea that personal jewelry must stay within those categories.

Tooth caps, body jewelry, custom pieces, alternative metals, and sculptural designs give wearers more ways to decide where attention should go and what an accessory should communicate. Contemporary fashion increasingly treats jewelry as a flexible tool for personalization. A small detail on a tooth can now make as deliberate a statement as a large necklace or a dramatic pair of earrings.
Fashion

A Style Guide to Getting Your Barefoot Sandals Fit Right


measure don't guess

Foot length alone does not always tell you whether minimalist footwear will fit well. Research published in the Journal of Sports Sciences by Devon Coetzee and colleagues describes minimalist shoes as having thin, flexible soles with little or no difference in height between the heel and toe.

These features allow the foot to sit and move differently than it does in a padded shoe. This is one reason first-time buyers may struggle to find the right size.

Sandals can make sizing even more important. They do not have a closed upper to hold the foot in place. Because of this, sizing barefoot sandals (סנדלי ברפוט) depends heavily on accurate foot measurements.

Your usual shoe size may not be a good guide. For example, someone who wears a size 9 running shoe may need a different size in barefoot sandals. The thin sole and straps change how the sandal fits and supports the foot.

Why Regular Shoe Sizes Don’t Always Work

Regular shoes often become narrower near the toes. This shape can push the smaller toes inward. Barefoot footwear uses a different shape that gives the toes more room.

Guidance from Bespoky Shoes notes that barefoot shoes should be widest around the toes. This follows the foot’s natural shape instead of pushing the toes into a narrow space. Because of this difference, your usual shoe size may not match your barefoot sandal size.

Sole thickness and strap placement can also differ between brands. Two barefoot sandals marked as the same size may still fit differently.

For this reason, footwear resources such as Anya’s Reviews recommend measuring your feet before buying a new pair. Do not depend only on the size of sandals or shoes you bought in the past.

What You’ll Need to Measure Your Feet

Before you start, gather these simple items:

  • A sheet of paper large enough for your foot
  • A pencil or thin pen
  • A ruler or tape measure with millimeters or centimeters
  • A hard, flat floor next to a wall

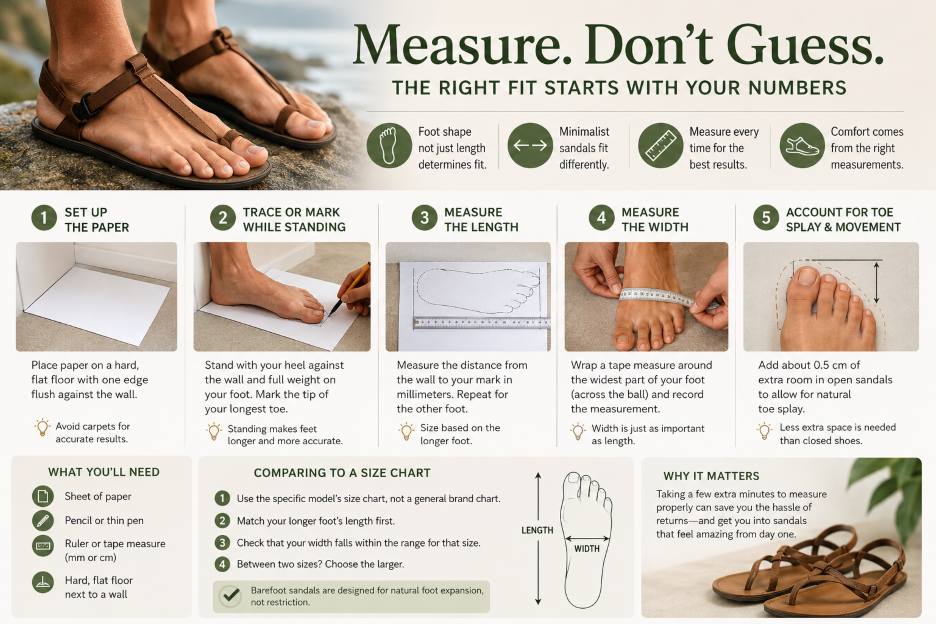
Step 1: Set Up the Paper

Put the paper on a hard, flat floor. Place one edge directly against the wall.

Freet Barefoot’s fitting guide recommends avoiding carpet when measuring. A soft surface may affect the shape of your foot or the position of the paper. Even a small change can affect your final measurement.

Step 2: Mark Your Foot While Standing

Stand on the paper with your heel touching the wall. Put your full weight on the foot you are measuring.

Standing is important because your foot spreads slightly when it carries your body weight. Barefoot Shoe Guide notes that a foot measured while sitting may appear shorter than it does while standing.

Keep your pencil straight up and down. Mark the end of your longest toe. Remember that your longest toe may not always be your big toe.

Step 3: Measure the Length

Step away from the paper. Use a ruler to measure from the edge that touched the wall to the mark for your longest toe.

Record the measurement in millimeters if possible. Millimeters give you a more exact number and reduce the need for rounding.

Repeat the process with your other foot. It is common for one foot to be slightly longer than the other.

When choosing a sandal size, use the measurement of your longer foot. This helps make sure both feet have enough room.

Step 4: Measure the Width

Length is only part of finding the right fit. You should also measure the width of your foot.

Use a soft tape measure around the widest part of your foot. This is usually across the ball of the foot, near the base of your toes. Write down the measurement.

Width matters with barefoot sandals because the straps need to sit in the right place. Sandals that are too narrow may push your foot over the edge of the sole. A sandal that is too wide may allow too much movement while walking.

Step 5: Leave Room for Your Toes to Move

Barefoot sandals are designed to give your toes space to spread as you walk. Your foot should not reach the very edge of the sandal.

Guidance from Shuu Barefoot suggests leaving about half a centimeter of extra space in open sandals. Closed barefoot shoes often need more room because they have a toe box and may be worn with socks.

The extra space should be small. Too much room can make the sandals harder to walk in, while too little can limit natural foot movement.

Comparing Your Measurements to a Size Chart

Once you have your length and width measurements, check the size chart for the exact sandal model you want to buy. Avoid using only a brand’s general size chart.

Different styles from the same company can have slightly different sole lengths and widths. Start by matching the measurement of your longer foot. Then check whether your foot width fits the listed range.

Before choosing a size:

  • Use the measurement of your longer foot.
  • Check both length and width.
  • Look at the size chart for the exact sandal model.
  • Allow a small amount of space for natural toe movement.
  • If you fall between sizes, check the brand’s fitting advice before ordering.

Taking a few extra minutes to measure your feet can help you avoid an uncomfortable fit or a return. It also gives your toes enough space to move naturally.

Once you have the right fit, you can think about how to wear your sandals with different clothes. This roundup of summer outfits for men offers ideas for pairing minimalist sandals with simple warm-weather outfits.

Fashion

What Fast-Moving Water Means for Clothing, Closets, and Textile Collections

Laundry room dehumidifier

Water finds fabric faster than most people expect. Cotton, wool, silk, and leather are all porous by nature, which means they draw in moisture within minutes of contact rather than hours. Once a pipe bursts, a roof leaks, or floodwater enters a closet, dyed textiles can bleed, leather can stiffen, and natural fibers can begin to weaken almost immediately.

This is exactly why speed matters so much in the first few hours after an incident. Homeowners and business owners dealing with a soaked closet, storage room, or retail floor benefit from treating the situation as a race against absorption, not a chore to handle later. Bringing in urgent water removal for homes and businesses during that early window often determines whether garments can be saved or whether the damage becomes permanent. The longer moisture sits against fabric, the more it spreads through fibers, dyes, and stitching.

Why Textiles Are So Vulnerable

Fabric behaves like a sponge. Insurcomm, a restoration and remediation firm, notes that porous, organic materials such as fabric and carpet padding give mold the nutrients it needs to establish itself quickly once they become damp. Clothing stored in closets often sits close together, which slows air movement and traps humidity against every layer.

Leather presents its own set of problems. According to research from Fibrenew, a leather repair and restoration company, water itself does not always ruin leather right away, since natural oils in the material create a temporary protective barrier. But once those oils are overwhelmed and the leather becomes fully saturated, stiffening, discoloration, and cracking can follow as the material dries unevenly. Steel Horse Leather, a leather goods maker, adds that the severity of the outcome depends heavily on how much water was absorbed and how long the item sat before anyone intervened.

Step-by-Step: Protecting Clothing and Textiles After Water Intrusion

1. Separate Wet Items Immediately

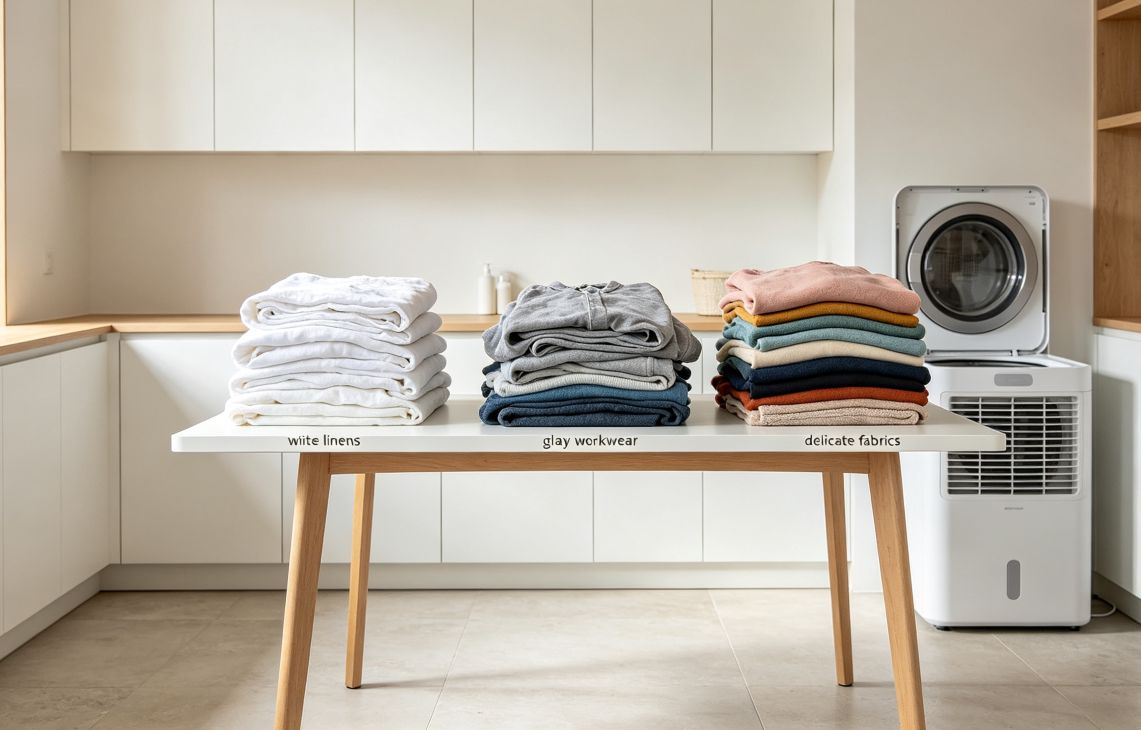
Move any wet clothing, linens, or accessories away from dry storage right away. Dye transfer happens quickly when a soaked garment touches a dry one, and colors can bleed onto neighboring fabric within a short period of contact. Sorting by fiber type, color, and material helps prevent one damaged item from spreading the problem to an entire wardrobe or inventory.

2. Prioritize Based on Material

Not everything needs the same response. Cotton and synthetic blends generally tolerate a delay of a few hours better than silk, suede, or leather. Items with structural padding, such as coats or bags, hold moisture longer than flat woven fabric and deserve earlier attention.

3. Air Out and Begin Drying

Guidance published by AAA recommends removing wet fabrics and drying them as soon as possible, and hanging furs and leather goods separately so they dry at room temperature rather than piled together. Fans and dehumidifiers help move air across surfaces, which shortens drying time considerably compared with letting items sit in a closed room.

  • Hang garments individually with space between each piece
  • Avoid direct heat sources like hair dryers on leather or suede
  • Use fans to keep air circulating through closets and storage rooms
  • Prop open drawers, cabinet doors, and luggage to expose hidden moisture

4. Watch the Clock for Mold Risk

Timing matters more than most people realize. Findings from restoration researchers cited by Insurcomm indicate that mold growth typically begins within 24 to 48 hours of water exposure, with visible growth often appearing between 48 and 72 hours. Reports from Midwest Restoration describe a similar pattern, noting that once humidity stays elevated without proper drying, mold colonies can spread aggressively through damp fabric and other absorbent materials. This makes the first two days the most important window for assessment and action.

5. Assess Before Deciding What to Keep

Once items are dry, examine them for lingering odor, stiffness, discoloration, or a musty smell that suggests moisture remains trapped in fibers or seams. Leather that has hardened may still respond to conditioning, while fabric with visible mold spotting or a persistent odor after drying often needs professional cleaning rather than a simple wash at home. Lingering dampness in a closet does not just threaten fabric either. It can also explain why a damp closet might need a cockroach exterminator, since roaches are drawn to the same warm, moist, dark conditions that encourage mold. A thorough closet check after water intrusion should include both.

Looking Ahead

Textile collections, whether a personal wardrobe or a business inventory, are rarely designed with sudden water exposure in mind. Building a basic response plan before an emergency happens, knowing which items to move first, having fans and space ready for air drying, and understanding when to call in professional cleaning or restoration support, can make the difference between a temporary setback and a permanent loss. Acting within the first hours after water intrusion remains the single most reliable way to protect fabric, leather, and dyed materials from lasting harm.

𐌢